A Portable Workshop, Not a Junk Drawer: Structuring a Developer Rescue USB for 2026
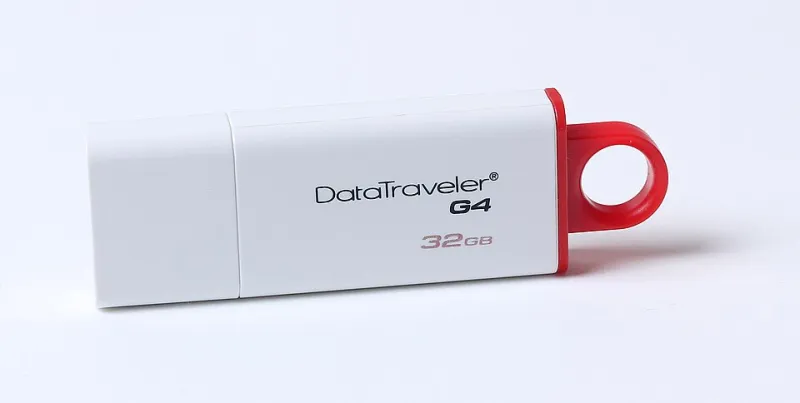
Photo: Dmitry Makeev, CC BY-SA 4.0, via Wikimedia Commons
When a workstation fails to boot, the ordinary support path—open a browser, search for a utility, download it—is unavailable. The machine that would host the fix is the machine that needs fixing. A developer rescue USB addresses that gap. It is not a backup drive and not a general-purpose thumb drive. It is a small, curated appliance: bootable images, portable diagnostics, and reference material organized so that a tired person can find the right tool in under a minute.
At RoSoft, we treat downloads as artifacts that need provenance and verification, not as files to collect. That principle matters even more on a rescue drive. The drive should be assembled deliberately, labeled clearly, and refreshed on a schedule. Otherwise it becomes the same unmaintained junk drawer that accumulates on every technician's shelf.
Define the Job Before Choosing the Hardware
A rescue drive has four jobs: diagnose hardware, recover data, rebuild an operating system, and provide network access when the installed OS cannot. Those jobs determine capacity and format. A 64 GB USB 3.2 drive is a reasonable starting point for most developers and IT staff; 128 GB provides room for multiple boot images and recovery tools without encouraging hoarding. Prefer a metal-bodied drive with a physical write-protect switch if one is available. Label it with a date and a short name such as RESCUE-2026-A. Keep a second drive as a verified spare, because flash media fails and because a rescue drive that cannot be read is not a rescue drive.
Do not use the rescue drive for daily file transfers. Every extra write cycle and every stray document increases the chance of corruption or accidental disclosure. Treat it as read-mostly media: update it during planned maintenance windows, then return it to the bag.
A Folder Layout That Survives Stress
Under pressure, directory names should describe tasks rather than vendors. A flat folder of downloaded installers forces the user to remember filenames; a task-oriented layout shortens the search. A workable structure looks like this:
00_README— a plain-text file with the drive's purpose, last refresh date, and a one-page index.01_boot_images— ISO files for live Linux systems, memory testers, and disk cloning environments.02_windows_tools— portable executables for hardware inspection, archive handling, and file recovery.03_linux_tools— scripts, checksum manifests, and small command-line utilities that run from a live session.04_docs— offline notes for network configuration, license keys for site-licensed tools, and vendor support numbers.05_checksums— SHA-256 manifests and signature files for every downloaded artifact.06_scripts— small, reviewed automation for mounting drives, collecting logs, or verifying media.99_quarantine— a temporary holding area for files that have not yet been verified or approved.
The README is not decoration. It should state what the drive is for, when it was last validated, and which boot images are known to work with Secure Boot enabled and disabled. A stranger should be able to pick up the drive and understand it without opening a chat window.
The Utility Set: Boot Images and Portable Tools
A rescue drive should cover both Windows and Linux environments without pretending to be a full software repository. For boot images, consider a mainstream Linux live image for general recovery, a dedicated system-rescue distribution for disk and boot repair, a memory-testing image, and a cloning or imaging environment. Keep each ISO in 01_boot_images with a version number in the filename and a matching checksum in 05_checksums.
For portable Windows tools, favor utilities that run without installation: an archive manager for extracting drivers and logs, a disk-health inspector for reading SMART attributes, a hardware information tool for identifying components, a file-recovery utility for accidental deletions, and a secure file-transfer client. For Linux sessions, include command-line essentials such as disk utilities, a partition editor, and a network diagnostic toolset. Cross-platform documentation belongs in 04_docs so that instructions remain available when the network is down.
Every tool should have a source URL recorded in the manifest. If a vendor requires an account or a license file, document that requirement in the README rather than discovering it during an outage. Avoid abandoned utilities unless there is a specific, tested reason to keep them. A rescue drive is not a museum of past software.
Refresh Cycle: Treat the Drive Like a Release
A rescue drive assembled in January and forgotten by June is a liability. Put the drive on a quarterly refresh cadence. During each refresh, download current versions from primary vendor sources, verify checksums and signatures, replace old images rather than stacking new ones beside them, and update the README with the refresh date. Run a boot test in a virtual machine or on a spare laptop. Confirm that the boot menu appears, that network drivers work in the live environment, and that at least one diagnostic tool launches.
Use a simple manifest—CSV is sufficient—with columns for tool name, version, source URL, checksum, date verified, and notes. Keep the manifest on the drive and in a version-controlled repository. When a tool is retired, remove it from the active folders and record the removal. The goal is not to preserve every historical version; it is to make the current state auditable.
Operational Discipline: What Not to Store
Do not store personal files, browser profiles, saved passwords, or customer data on a rescue drive. If credentials are necessary for recovery workflows, use a separate encrypted volume with a documented recovery procedure, not a plain-text file in 04_docs. Do not download utilities from aggregator sites that wrap installers in adware. Do not keep unverified executables in the active tool folders; use 99_quarantine until checksums and signatures are confirmed.
Finally, test the drive before you need it. A rescue USB is insurance, and insurance is only useful when the policy is current. A modest quarterly routine—verify, boot, document, retire—keeps the drive from becoming another forgotten artifact in a desk drawer.